
Описание
Описание:
1.Easy to follow step-by-step instructions
2. Подходит для всех популярных цветов и зерен
3.Does not migrate during cure
4. Экономит стоимость и не требует тепла
Цвет:Черный, коричневый, красный, желтый, зеленый, синий, белый
Срок службы:12 месяцев
Вес: 100 г
Specifications:
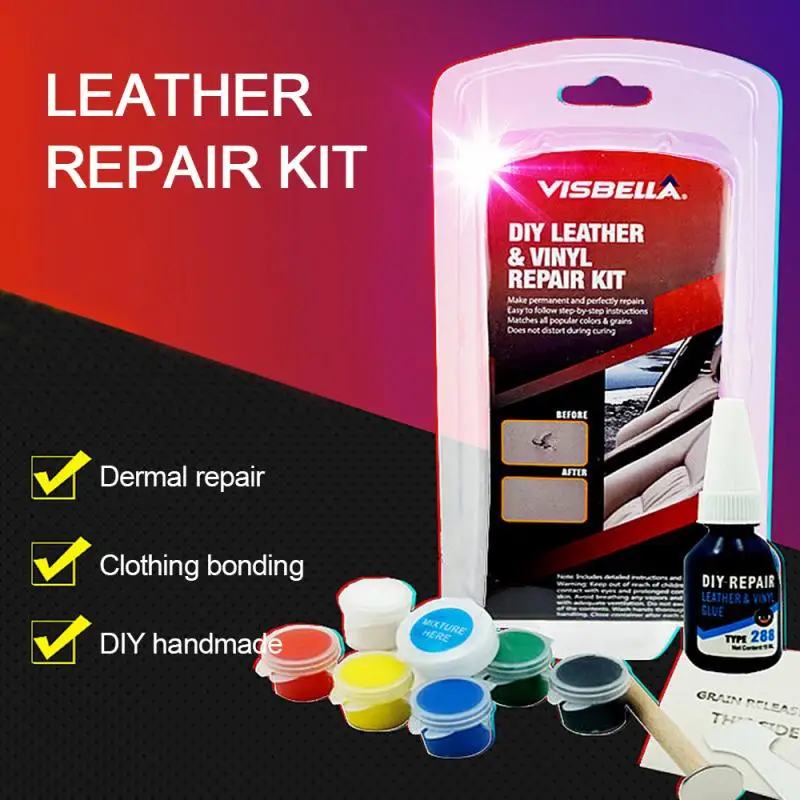
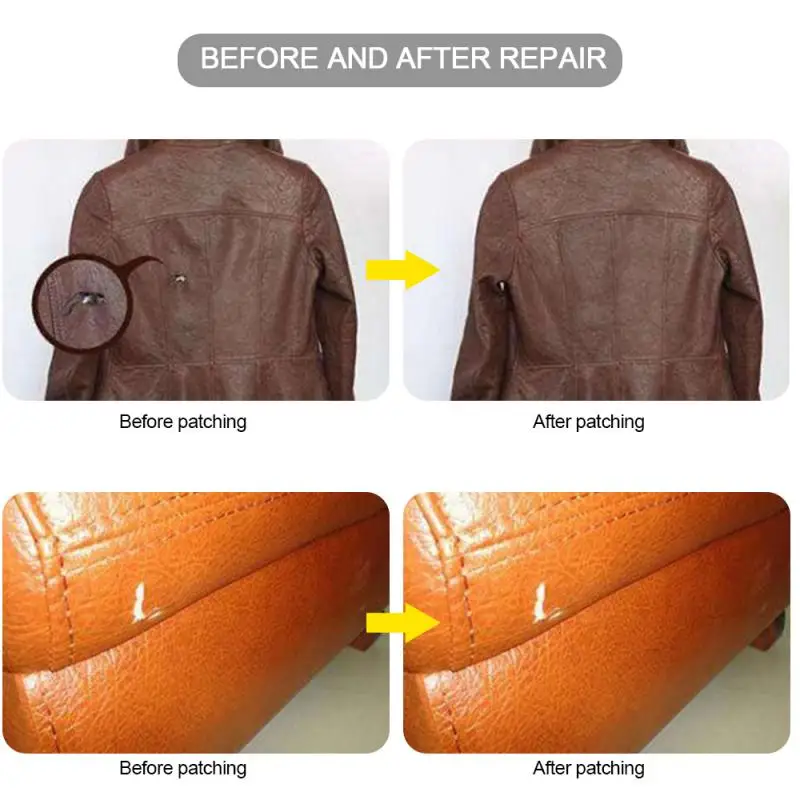
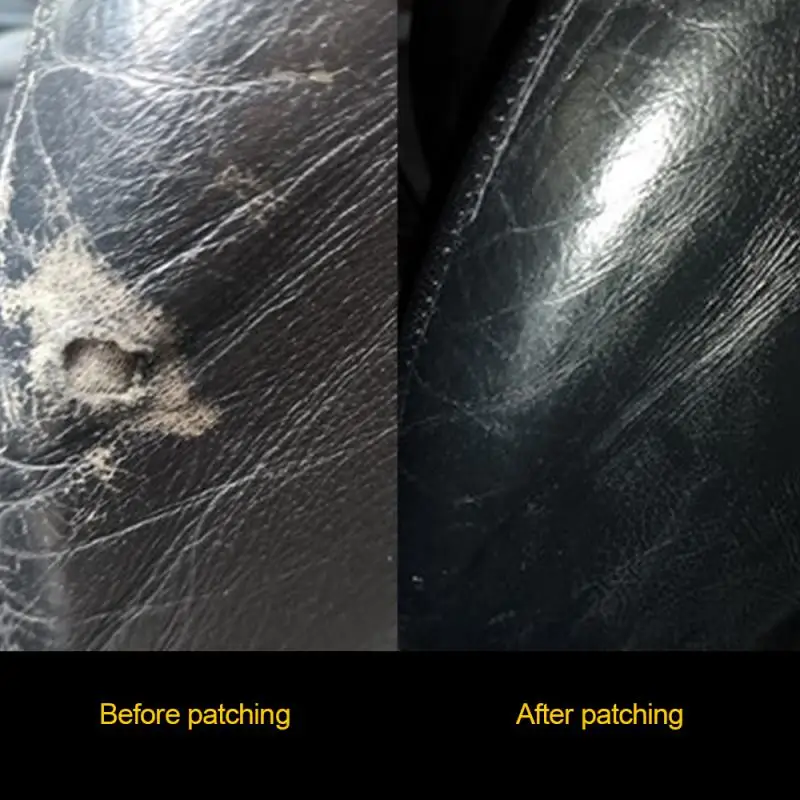
Visbella DIY leather and vinyl repair kit is very handy and easy to help you to repair any cracks,cuts,burns and tears on leather and vinyl materials.A variety of colors and grain papers designed to match surrounding materials makes repairs blend in with existing A color matching guide helps determine the correct color to match the damaged surface. With the complete directions that are included in the kit, you can achieve a quality result without the cost or expertise of a professional.
Package Included:
7* Heat Cure Compounds
2* Grain Papers
1*15ml Repair Adhesive
1* Leather Piece
1* Backing Fabric
1* Practice Spatula
1* Mixing Cup
1* Heat Transfer Tool
1* Instruction Manual
Notes:
Handy tips:
1.Before using the product, it is recommended to first practice on an area that is usually unseen or hidden from view (the back of your couch for example) or with the provided sample.
2.When mixing your desired color, check the color match by rubbing a small amount of the paint onto the undamaged vinyl. Remove the paint with a rag.
3.During steps 2 and 4, you can use a hairdryer to speed up the drying process. Keep the paint jar cap dosed to prevent the paint from drying up. Also, make sure the sealer adhesive is not left open for an extensive amount of time.
4.For repairs smaller than 1/4 of an inch, the backing fabric is not required in the repair.
5.If too much adhesive is applied, use a wet sponge to remove excess adhesive before it dries. If the adhesive dries, use rubbing alcohol or nail polish remover to remove the dried adhesive.
Product Instruction:
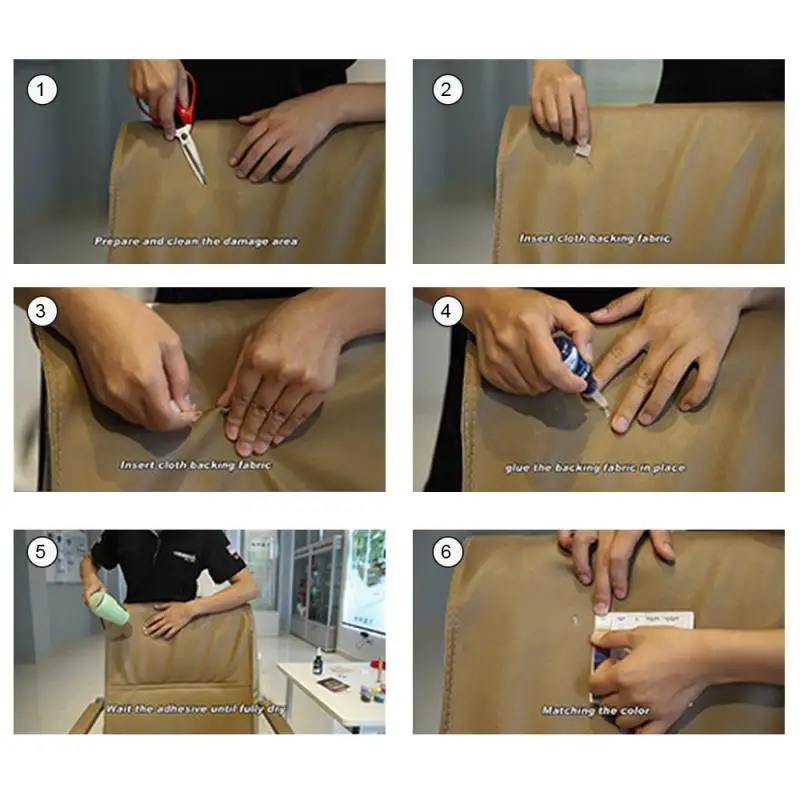
Step1. prepare and clean the damaged area
Clean the damaged area with a household cleaner. Make sure the area is dry before starting the repair. Carefully trim off frayed, excess threads, of charred material with razor blade or knife. If there is burn damage, remove charred material with razor or knife.
Step2. Insert backing fabric
For repairs greater than 1/4 inch, cut the enclosed backing fabric slightly larger than the damaged area. Use the spatula to insert the backing fabric into and under the damaged to provide support for the repair.
Step3.Choose grain paper
On the top center of the grain paper, make an outline of the damaged area. This will allow you to accurately position the heat transfer in step7.
Step4. Fill the damage
For deep damages, like a vinyl dashboard, use the vinyl adhesive to glue the backing fabric in place and fill in damaged area to level with the surface. Allow the adhesive to fully dry. This will take 2-3 hours at room temperature a hair dryer can be used to speed up this process). The adhesive will shrink slightly when dry, leaving a void which will be filled in with the colored repair compound later.
Step5.Matching the color
Prepare the color repair compound while the adhesive is drying. Refer to the provided color chart. Choose from the 7 provided colors by using the spatula to mix small amount of color until correct shade is achieved. If you need to lighten the color, add small drops of white paint and if you need to darken, add small drops of black paint. Check the color accuracy by rubbing a small amount of the color onto the undamaged vinyl; then, remove the compound with a rag.
Step6. Applying the color repair compound
Once vinyl adhesive is dry, use the spatula to evenly and neatly apply the repair compound onto the damaged area. Wipe any excess compound from around the hole or damage. Do not overfill the damage area. It is highly recommended to use less compound rather than more. It is easier to add more later if necessary. Next, tape the grain paper over the uncured color compound making sure the outline is directly over the damaged area. Do not move it. If repair is on a vertical surface, tape the grain paper down.
Step7. The cure
This is the most important step in the repair process.
Note: Heating element required. Plug in a hot iron and allow it to warm up for four minutes on a high setting. Place the metal tip of the heat transfer tool directly onto the iron for 2-3 minutes to heat the tool. Then immediately place the metal tip onto grain paper. Rotate the heat tool over the marked circle in a rapid circular motion for 1 minute. For a proper cure, heat must be applied over grain paper. If repair is large, reheat the tool and repeat the procedure as many times as needed until the repair paint is fry. Allow 1-2 minutes for the grain paper to cool. Once cooled, slowly peel off the grain paper and examine the repair. If damaged area is tacky, repeat this step. If there are any pinholes or spots that were not filled in properly, apply small additional amounts of repair compound onto those ares and repeat this step.


Характеристики
- Бренд
- JOSHNESE
- Тип товара
- Уборщик кожи & драпирования
- Color
- Black, Brown, Red, Yellow, Green, Blue, White
- Lifespan
- 12 months
- Weight
- 100g
Сопутствующие товары


